Tuning And Voicing · Volume 5
Tuning & Voicing — Vol 05: Voicing & Tuning Reeds
The four volumes before this one dealt almost entirely with flue voices — the stopped flute, the open pipe and its scaling, the string pipe, all of them tuned either by moving a length of tube or by moving a stopper inside one. Vol 03 set out how the pitch of each pipe family is actually moved, and Vol 04 covered voicing the flue ranks for prompt, blended speech. This volume turns to the other whole family of organ tone, the reed, and does one thing only: it brings a reed voice to pitch and to speech at the bench. It does not build the reed — the sibling dive “Building Organ Pipes” makes the reed pipe, harvests the free reeds, rolls the cardboard resonator, and hands the finished, roughly-assembled rank to this volume to voice and tune.
Two mechanically distinct reeds have to be kept apart at every step, because they are voiced and tuned by opposite methods:
- A beating (striking) reed has a brass tongue wider than the opening it covers, so the tongue slaps shut against the flat face of a shallot once per cycle. It is the traditional organ reed. It is voiced by setting the curvature and weight of that tongue and tuned by moving a tuning wire along the tongue’s length.
- A free reed has a tongue narrower than the slot it sits in, so it passes cleanly through its own frame and touches nothing — the reed of a harmonica, accordion, or melodica. It is tuned by removing metal from the tongue itself (there is no wire), and its resonator is tuned to it afterwards.
Guardrail — do not blur the two. A beating reed strikes a face and is tuned by a wire; a free reed passes through its frame and is tuned by scratching the tongue. Every “scratch the tongue” instruction from §3 onward refers to the free reed. Every “move the wire” instruction in §2 refers to the beating reed. The two are not interchangeable, and the tools that tune one will not tune the other.
Where the physics lives. Why a tongue and a resonator lock into a note, why a beating reed’s pitch lives in the free length of the tongue, and why a free reed’s pitch lives in the tongue’s own mass and stiffness rather than in the tube above it, all belong to the sibling acoustics dive “How Organ Pipes Make Sound.” This volume names those relationships and uses them at the bench; it does not re-derive the excitation theory. Pitch deviations are given in cents, dimensions in millimetres and centimetres (the hobby sources are metric), and the free-reed numbers are quoted exactly as the sources give them. Craft facts are cited inline: (jsart51) for Gisli Olsen’s free-reed article on
melright.com/busker, (en_31toets) for the 31-note Ulrich Stille build onhobbycrankorgan.com, and (O’Rourke/tuning.htm) for Hal O’Rourke’s Raffin owner tuning guide. Anything the sources do not pin down is marked (est.).
5.1 Voicing versus tuning, applied to a reed
The two crafts named in Vol 01 apply to a reed as much as to a flue pipe, but they land on different parts of the assembly, and it is worth stating precisely what each means for a reed before touching either one.
- Voicing a reed is adjusting how the tongue moves — how it opens and closes against (or through) its opening — so that the note starts promptly, holds a steady tone, and speaks at a sensible loudness. For a beating reed this is the curvature and weight of the tongue; for a free reed it is very nearly fixed at the factory, because the reed arrives already curved and voiced inside its parent instrument.
- Tuning a reed is adjusting its pitch to the scale. For a beating reed this is the position of the tuning wire; for a free reed it is the mass and stiffness of the tongue, changed by filing or scratching metal away, followed by tuning the resonator to agree with the reed.
As with every voice on the organ, the order is voice first, tune last, in a stable temperature and at the organ’s own wind pressure (Vol 01; the ~5 in H₂O = 127 mm ≈ 1.245 kPa small-organ standard belongs to the “Wind Systems” dive). The reed is voiced against the pressure it will actually run at, then brought to pitch, and the pitch is set last because so much of what a voicer does to a reed also nudges its frequency.
5.2 The beating reed — voicing by curvature, tuning by wire
The beating reed is the professional voice — the trumpet, trombone, oboe, and clarinet of a large organ. The sibling dive lays out its anatomy in full; here only the parts that a voicer actually touches are named, because those are the parts that control tone and pitch.
5.2.1 The parts a voicer touches
Bottom to top, a beating reed pipe carries:
- Boot — the closed foot-cup that admits wind from the chest and houses all the reed hardware. A voicer opens the boot to reach the reed and re-seats it to test.
- Shallot — a small part-closed tube (a tube with one side planed flat and open) seated in a block inside the boot. The flat, open face of the shallot is the surface the tongue beats against, and its trueness governs whether the reed speaks cleanly or rattles.
- Tongue — the vibrating strip of brass, curved along its length and laid over the shallot’s flat face, clamped at its top by a wedge and free at its lower end. Because the tongue is wider than the shallot’s opening, it cannot pass through; it beats against the face, closing and reopening the opening once per cycle. This tongue is what the voicer shapes.
- Tuning wire (tuning spring / crook) — a stiff wire pressing against the face of the tongue partway along its length. Sliding the wire changes the tongue’s free vibrating length, and therefore the pitch. This wire is what the tuner moves.
- Resonator — the tube (often conical, flared like a small horn) above the boot that reinforces and colours the tone. It is tuned to agree with the tongue, not the other way round.
5.2.2 Voicing — setting the tongue’s curvature and weight
Voicing a beating reed is, more than anything else, setting the curve of the tongue along its length. The tongue is not laid flat on the shallot; it is given a gentle lengthwise curvature so that, as it vibrates, it peels off the shallot face and rolls back onto it progressively — closing and opening the opening in a smooth zip rather than slapping flat all at once. That curve is what the whole tone and the prompt speech of the reed depend on:
- Curvature near the tip governs the attack and the brightness. A tongue that lies close to the shallot near its free tip closes the opening sharply and speaks brightly and promptly; one curved well away from the face near the tip starts more slowly and speaks more softly and roundly.
- Curvature along the body governs how much of the opening is covered through the cycle, and so the loudness and the harmonic development — how much of the wind the tongue chops into strong upper partials.
- The thickness and weight of the tongue set its basic register: a thinner or lighter tongue for the same length vibrates faster and speaks with less body; a thicker or weighted one vibrates slower and with more fundamental. Adding a trace of weight low on the tongue (or thinning it) is a coarse voicing lever, distinct from the pitch-fine wire above.
The essential point for this dive is that the curve controls how the tongue closes against the shallot, and that closing controls the tone and the promptness. A reed that chiffs, rattles, or starts late is nearly always a curvature problem, adjusted by carefully re-bending the tongue with a burnisher against the shallot face — and that re-bending is the hand skill the hobby sources judge too difficult for the amateur (see §2.4).
5.2.3 Tuning — moving the wire changes the free length
The pitch of a beating reed is set entirely by the free vibrating length of the tongue, and that length is set by the position of the tuning wire. O’Rourke’s owner guide states the operation plainly for a Raffin trumpet rank: the reeds are “tuned by moving the wire sliders” (O’Rourke/tuning.htm). The direction is fixed by geometry:
- Move the wire toward the tip (the free end) → the tongue is clamped closer to its tip → the free vibrating length is shorter → the tongue vibrates faster → the pitch goes sharper.
- Move the wire away from the tip (toward the clamped top) → the free length is longer → the tongue vibrates slower → the pitch goes flatter.
A shorter vibrating length always means a higher pitch, exactly as a shorter plucked string does. Nothing about the resonator length above the reed sets this pitch; the resonator is tuned to agree with the tongue after the wire has set it. This is the opposite relationship to a flue pipe, where the tube length sets the pitch outright.
Figure 1 — Voicing and tuning a beating reed. VOICING sets the lengthwise curvature of the brass tongue, which controls how it peels off the shallot face and therefore the tone and promptness (right inset). TUNING moves the tuning wire: toward the tip shortens the free vibrating length and makes the reed sharper; toward the clamp lengthens it and makes it flatter — the Raffin reeds are “tuned by moving the wire sliders” (O’Rourke/tuning.htm). The resonator above is tuned to agree with the tongue afterward; the excitation physics is in “How Organ Pipes Make Sound.”
5.2.4 Why the hobby route is the free reed, not the beating reed
The beating reed is the harder voice to voice, and both principal hobby sources reach the same verdict independently: the metal-wire beating-reed “trumpet” is judged too hard for the amateur to make and voice, so both substitute a free reed instead (en_31toets; jsart51). The reason is exactly the curvature work of §2.2 — a beating reed only speaks well if the tongue is cut, tapered, and curved by hand to peel off a truly flat shallot face, and getting that curve right is a hand skill built over many reeds with tools and brass stock the amateur does not have. The free reed sidesteps all of it: the vibrating tongue arrives already made, already curved, already voiced inside a cheap melodica, so the hobbyist tunes it rather than voices it. The rest of this volume is therefore about the free reed — the beating reed is included so a builder knows the professional part by name and understands what the free-reed route is standing in for.
5.3 The free-reed “melodica trumpet” — tuning in full
The practical hobby reed rank is built from free reeds harvested from a cheap melodica or harmonica and mounted on a home-made cardboard resonator — the full build is in “Building Organ Pipes.” This volume takes the roughly-assembled rank and brings it to pitch and to its best speech. Every dimension and every cent figure below is quoted exactly as the sources give it (jsart51; en_31toets).
5.3.1 Use the air-out reed of each pair; tape off the air-in reed
A free-reed instrument’s reeds sit on an aluminium plate and come in pairs: one reed of each pair speaks when air is blown out through its slot, and its partner speaks when air is drawn in — the “blow” and “draw” reeds of a harmonica. An organ pipe only ever passes wind one way, out of the chest and up through the pipe, so only the air-out reed is used. The air-in reed of the pair is taped off, closing its slot so no wind leaks past it, and left in place as a spare (jsart51). This is the first place the guardrail bites: these are free reeds — each tongue passes cleanly through its slot and touches nothing. Nothing here is filed to beat against a face.
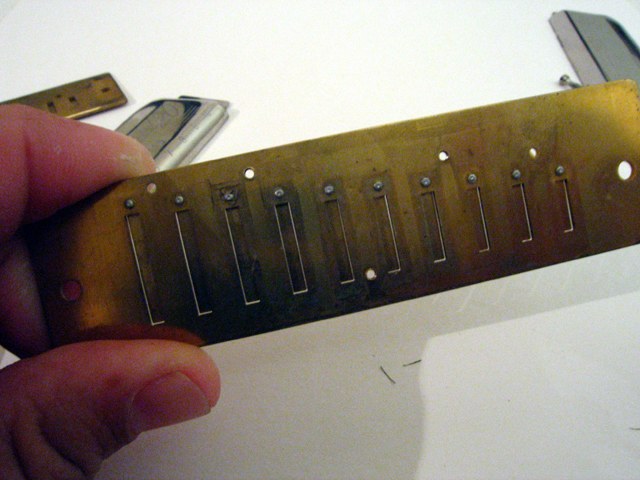
5.3.2 Where the reeds start: A = 420 Hz, about 20 cents sharp at A = 440
Free reeds from a typical cheap instrument are factory-tuned to A = 420 Hz (jsart51). A crank organ tuned near modern concert pitch wants its A near A = 440 Hz (or the A = 442/443/445 that these organs are commonly built at — see Vol 02 and Vol 03 for pitch choice; the point is internal consistency, not the absolute number). Measured against an A = 440 tuner, the reeds as bought read about 20 cents sharp — each reed comes in roughly 20 cents high relative to the note it must play, so every reed has to be lowered before it can be tuned into the rank (jsart51). This is the builder’s own reported figure, taken as given.
A free reed’s pitch is set by the mass and stiffness of the tongue itself, not by the resonator length. To flatten it, add effective mass or remove stiffness in the right place; to sharpen it, remove mass near the tip. Why this is so is in “How Organ Pipes Make Sound” — here it is used, not derived.
5.3.3 Lowering a free reed: scratch the middle of the tongue, 3–4 mm
To lower a free reed’s pitch, metal is removed from the middle of the tongue. Thinning the tongue near its centre reduces its stiffness there and drops the frequency. The method, quoted exactly (jsart51):
- Lay the reed-plate flat on a hard surface, so the delicate tongue is supported from below and the tool cannot bend or crack it.
- With a needle or a fine (small) file, scratch the middle of the tongue over a length of 3–4 mm.
- Work “little by little, very light” — a few strokes, then stop.
- Re-check the pitch on the tuner after each pass, and keep going until the reed reads about 4–5 cents above zero.
The target is deliberately not dead-on and not flat: the reed is left about 4–5 cents sharp so that the final resonator tuning (§3.4) and any settling of the tongue leave headroom to come down to pitch, rather than needing metal added back — which cannot be done (jsart51). Three numbers here are quoted exactly and must not be rounded away: the reed starts ~20 cents sharp, the scratch runs over the tongue’s middle 3–4 mm, and the stopping point is ~4–5 cents above zero.
5.3.4 Raising a free reed: scratch the tip
The complementary move, for a reed that has been taken too flat or one that must be raised, works at the opposite end. To raise a free reed’s pitch, remove metal from the tip — the free end — rather than the middle. Taking mass off near the free end lets the tongue vibrate faster, and the pitch goes up (jsart51’s recipe only lowers, since the factory reeds start sharp, but the general direction is fixed by the physics: tip → sharper, middle/base → flatter). In practice the whole rank starts sharp and is worked down by the §3.3 middle-scratch; the tip-scratch is the correction if a reed overshoots and must be nudged back up. The same “flat on a hard surface, very light, re-check after each pass” discipline applies.
Direction summary, free reed. Scratch the middle → lower (flatter). Scratch the tip → raise (sharper). This is the inverse dependence to the beating-reed wire (§2.3), where moving the wire toward the tip raises the pitch — because the wire changes the free length while the scratch changes the tongue’s mass. Keep the two straight.
5.3.5 Tuning the resonator to the reed — slide the stopper to the resonance dip
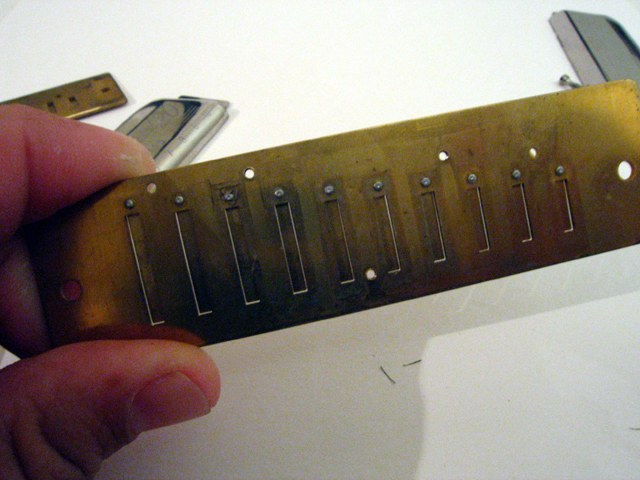
Once a reed is lowered to about 4–5 cents sharp and its plate is mounted, the resonator is tuned to the reed — not the reed to the resonator. The reed’s own pitch is already set by the tongue; the tube is there to reinforce and colour it, and it does that best when its air column resonates at the reed’s frequency. The tube is brought to that resonance by sliding a stopper inside it to change the length of the closed air column, and the source describes exactly what the tuner hears and sees while doing so (jsart51):
As the stopper is slid, the tuner reading starts high, goes lower, and then turns up again — and the lowest point is the resonance. The stopper is left at that lowest point.
That dip is the whole method. The reading passes through a minimum as the tube length sweeps through the reed’s frequency; the stopper is parked at the bottom of the dip, where the tube reinforces the reed most strongly and most sweetly. The resonator itself is a rolled 0.5 mm cardboard tube about 12 cm long (a full rank in this build is 13 tubes), and the working length — measured from the middle of the reed to the inside of the closed top — runs from about low C ≈ 10 cm to about high C ≈ 6 cm, with the notes between graduating across that range (jsart51). Critically, the source adds that this length is “not critical”: the reed sets the pitch, so the stopper is slid to the position of best, loudest, most singing resonance rather than to a length calculated to the millimetre (jsart51). This is the exact opposite of a flue pipe, where the tube length sets the pitch and the tuner reads it off the length.
Figure 2 — The free-reed tuning sequence (jsart51). Step 1: with the plate flat on a hard surface, scratch the middle of the tongue over 3–4 mm with a fine file, a little at a time, checking the tuner after each pass, until the reed reads ~4–5 cents sharp (down from ~20 cents sharp). Step 2: slide the resonator’s stopper and watch the tuner: the reading starts high, drops to a lowest point, then rises again — that lowest point is the resonance, and the stopper is parked there. The tube reinforces the reed; it does not set the pitch, so its length (low C ≈ 10 cm, high C ≈ 6 cm) is “not critical.”
5.3.6 Mounting the plate: beeswax, and the plate must not be heated
The reed-plate is fixed to its wood mount with beeswax, not glue, and the tuner has a direct stake in how the wax is applied because it protects the tuning just done. The wax is melted and run around the wood-and-wax joint with a soldering iron moved fast, but the reed-plate itself must not be heated (jsart51). Heating the aluminium plate would disturb the carefully-lowered tongue tuning of §3.3 and could anneal or distort the tongue — so the iron works the wood-and-wax joint quickly while the plate stays cool. Beeswax is chosen deliberately: it seals airtight, holds firmly at the low working pressure, and is reversible — a reed can be lifted and re-scratched or replaced by re-warming the wax, which a PVA or epoxy joint would not allow. That reversibility is what makes a free-reed rank re-tunable later, and it is the reason the mounting medium is a tuner’s concern and not just a builder’s.
5.3.7 Finishing and the result
The rolled cardboard tube is fragile, so once tuned it is reinforced with one layer of newspaper laid on with thinned PVA, dried, and then painted (jsart51). The paper-and-PVA skin stiffens the tube against handling and against moisture, and the paint seals and finishes it to match the rest of the pipework. Painting is done after the stopper tuning of §3.5, so the resonance is not disturbed.
The payoff, in Gisli Olsen’s own words, is that the home-made free-reed rank “gives a special sound … together with the stopped rank the sound is much better, almost singing” (jsart51). This is the key practical point for tuning: the free-reed “trumpet” is not tuned or judged as a solo voice — a naked free reed on a cardboard tube can sound thin by itself. It is tuned to be combined with the stopped flute rank of Vol 04, which supplies the round, fundamental-heavy body while the reed adds a bright singing edge on top. So the reed rank is tuned against the stopped rank it will play with — to the same reference pitch, at the same temperature — and the two are judged together, not apart.
5.3.8 The free-reed tuning steps at a glance
Table 1 — 3.8 The free-reed tuning steps at a glance
| Step | Action | Number / target (source) |
|---|---|---|
| Select | Use the air-out reed of the pair; tape off the air-in reed as a spare | one of each pair (jsart51) |
| Start | Measure the harvested reed against an A = 440 tuner | factory A = 420 Hz → ~20 cents sharp (jsart51) |
| Lower | Scratch the middle of the tongue with a needle/fine file, flat on a hard surface, “little by little, very light”; re-check after each pass | over 3–4 mm, down to ~4–5 cents sharp (jsart51) |
| Raise (correction) | If a reed overshoots flat, scratch the tip to bring it back up | direction only: tip → sharper (jsart51) |
| Mount | Fix the plate to the wood mount with beeswax, soldering iron moved fast | plate must NOT be heated (jsart51) |
| Resonator | Slide the stopper to the resonance dip (reading high → low → up; park at the lowest point) | tube ~12 cm; low C ≈ 10 cm, high C ≈ 6 cm; length “not critical” (jsart51) |
| Finish | Reinforce with one layer of newspaper + thinned PVA, dry, paint | after tuning, so resonance is not disturbed (jsart51) |
| Blend | Tune the rank to, and judge it with, the stopped rank | ”almost singing” together (jsart51) |
5.4 Reed versus flue — temperature drift, and keeping the ranks together
The last thing a reed voicer must understand is that a reed rank and a flue rank do not drift the same way with temperature, and that difference is the single most common reason a freshly-tuned organ sounds out of tune later.
5.4.1 Flue pipes go sharp when warm, flat when cold
A flue pipe’s pitch is set by the speed of sound in the air column divided by the pipe’s resonant wavelength. The speed of sound rises with temperature — c ∝ √T, with T in kelvin — while the pipe length (and so the wavelength) is essentially fixed. So f = c/λ rises as the air warms: a flue pipe goes sharp when warm and flat when cold. As a working magnitude, warming from 20 °C to 30 °C multiplies the pitch by √(303/293) = 1.0169, i.e. about +1.69 %, which is roughly +29 cents per 10 °C, or about ~3 cents per °C (est.) as a rule of thumb. Vol 03 covers this in full for the flue ranks; it is repeated here only so the comparison with reeds is exact.
5.4.2 Reeds barely move
A reed’s pitch is set by the mechanical vibration of the metal tongue, not by an air column, and a metal tongue’s frequency changes very little over the temperature swings an organ sees. The tongue’s stiffness and mass shift only slightly with temperature, so a reed rank’s pitch is nearly stable while the flue ranks around it move. The exact temperature coefficient of a small brass free reed is (est.) and small — the load-bearing fact is only its direction and relative size: the reed moves far less than the flue.
5.4.3 The consequence: warm room, reeds sound flat relative to the flues
Put the two together. In a warm room the flue pipes go sharp while the reeds stay put — so the reeds sound flat relative to the flues. In a cold room the flues go flat while the reeds stay put — so the reeds sound sharp relative to the flues. The two families drift apart whenever the temperature changes, because one tracks the air and the other tracks the metal. This is a well-established organ-tuning fact, and it is exactly why a mixed flue-and-reed organ can be spotless in the workshop and noticeably beating out on a cold street, or in a warm marquee.
Table 2 — 4.3 The consequence: warm room, reeds sound flat relative to the flues
| Condition | Flue ranks (air column, c ∝ √T) | Free-reed rank (metal tongue) | Audible result |
|---|---|---|---|
| Warmer than tuned | go sharp (~+3 c/°C, est.) | barely move | reeds sound flat relative to flues |
| At the tuning temperature | on pitch | on pitch | in tune together |
| Colder than tuned | go flat | barely move | reeds sound sharp relative to flues |
5.4.4 The practical rule
The rule follows directly and is the one thing to carry away from this section: tune the free-reed rank to the flues at the temperature the organ will actually be played, and expect the two families to drift apart if the temperature changes. Concretely:
- Let the whole organ reach the playing temperature before tuning the reed rank to the flues — do not tune a cold organ that will be played warm, or the reeds will end up flat of the flues in use.
- Tune the reeds against the flue ranks, not against the tuner in isolation, and at that temperature; the flues and reeds only have to agree with each other at the temperature of use, whatever the absolute pitch.
- If the organ is regularly played across a wide temperature range, accept that the reed and flue ranks cannot both be perfect everywhere. Tune them to agree at the most common playing temperature and treat any residual drift at the extremes as the physics, not a fault to be chased.
This is a reed-specific instance of the golden rule that runs through the whole dive — tune in a stable temperature, at the temperature of use (Vol 01; Vol 03) — made sharper by the fact that reeds and flues respond to temperature by different laws and pull apart in opposite directions from wherever they were set.
5.5 What this volume set down, and where next
This volume brought the reed voices to pitch and speech. The beating (striking) reed is voiced by setting the lengthwise curvature and the thickness/weight of the brass tongue — the curve controls how the tongue closes against the shallot face, and so the tone and the promptness — and tuned by moving the tuning wire: toward the tip for a shorter free length and a sharper pitch, toward the clamp for a longer free length and a flatter pitch (“tuned by moving the wire sliders,” O’Rourke/tuning.htm). Because that curvature work is judged too hard for the amateur, the practical hobby reed is the free reed (§2.4).
The free-reed “melodica trumpet” is tuned in full: use the air-out reed of each pair (tape off the air-in reed); the reeds start at A = 420 Hz, about 20 cents sharp at A = 440, and are lowered by scratching the middle of the tongue over 3–4 mm, flat on a hard surface, “little by little, very light,” until they read ~4–5 cents above zero — a reed taken too flat is brought back up by scratching the tip; the plate is mounted with beeswax (soldering iron moved fast, plate never heated); and the resonator is tuned to the reed by sliding a stopper to the resonance dip (reading high → low → up; park at the lowest point), the tube ~12 cm long, low C ≈ 10 cm, high C ≈ 6 cm, length “not critical”; then papered with thinned PVA and painted (jsart51). Tuned with the stopped rank, the result is “almost singing” (jsart51). Finally, because reeds barely move with temperature while flues go sharp when warm / flat when cold (c ∝ √T), the reed rank is tuned to the flues at the playing temperature, and the two drift apart if that temperature changes (§4).
For the build of every reed pipe named here — harvesting the melodica reeds, rolling the cardboard resonator, cutting the wood mount — see the sibling dive “Building Organ Pipes”, which makes the rank this volume tunes. For the excitation physics behind every “why” — how a tongue and a resonator lock into a note, why the wire and the scratch move the pitch — see “How Organ Pipes Make Sound.” Setting pitch across all the pipe families, including the reed methods used here, is Vol 03; voicing the flue ranks the reed blends with is Vol 04. The next volume, Vol 06 — the tuning & voicing session, puts every rank in order: warming the whole organ to the playing temperature, voicing each rank on the manometer bench, tuning it against the tuner and the other ranks, setting the doubled pipes to zero beat and the celeste rank to its gentle waver, and keeping the finished organ — flue and reed alike — in tune through the seasons.
Comments (0)